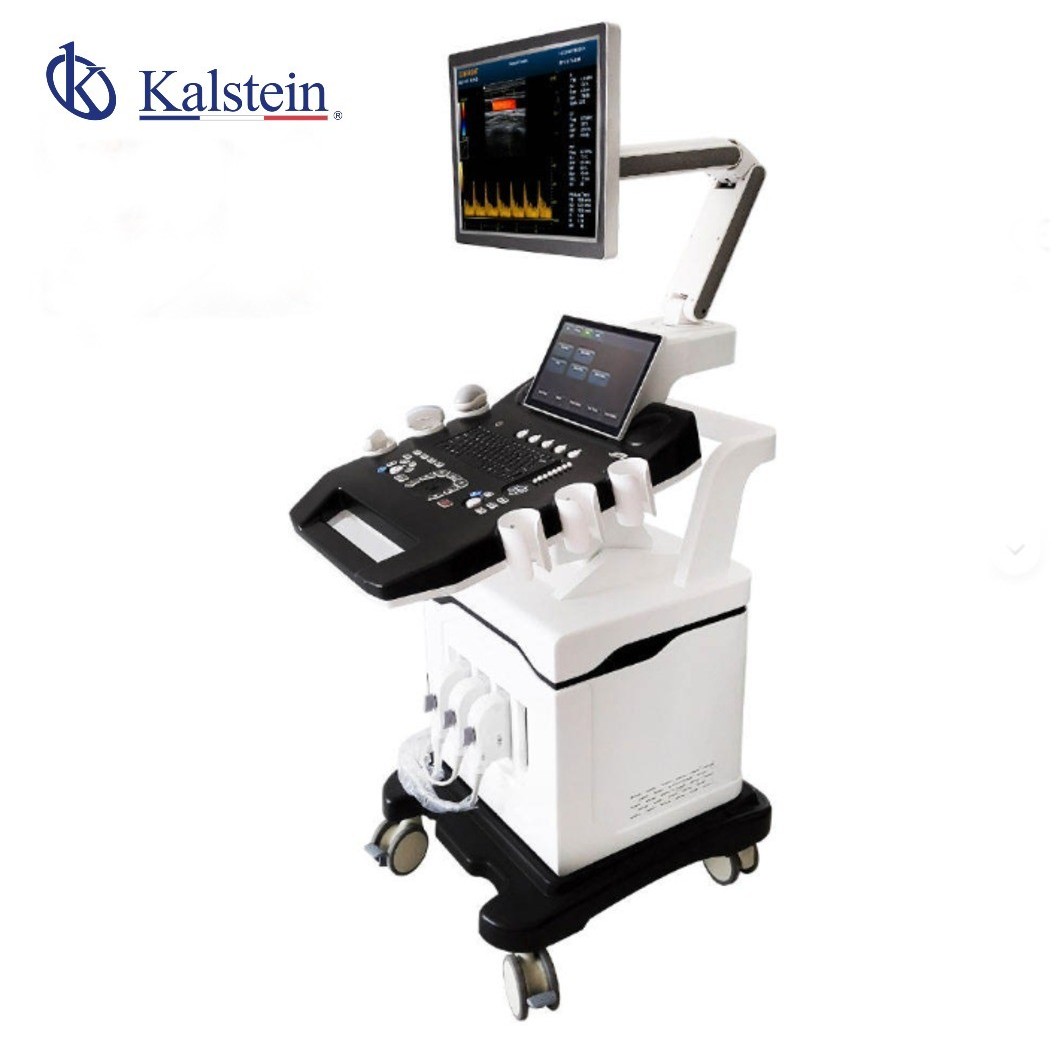
Installations- och driftsättningsguide för YR06635 High-End 3D/4D Color Doppler Ultrasound Scanner
Välkommen till den omfattande guiden för installation och driftsättning av YR06635 High-End 3D/4D Color Doppler Ultrasound Scanner. Denna toppmoderna enhet är utformad för att leverera exceptionell bildkvalitet inom olika medicinska tillämpningar. Detta dokument kommer att hjälpa dig att navigera installationsprocessen och säkerställa optimal prestanda från allra första början.
Förstå YR06635 Ultrasound Scanner
YR06635 är en avancerad diagnostisk bildlösning som kombinerar 3D- och 4D-färgdopplerteknik. Den tillgodoser moderna medicinska och veterinäranläggningar som kräver hög precision inom olika tillämpningar, inklusive komplex obstetrik och gynekologi, abdominalstudier och kardiovaskulär diagnostik.
Tekniska specifikationer för YR06635
| Egenskaper | Specifikationer |
|---|---|
| Modell | YR06635 |
| Skärm | 15-tums LED (1024 x 768) |
| Transducerportar | 4 aktiva portar |
| Lagring | 64GB SSD (Valfritt 120GB/200GB) |
| USB-portar | 4 portar |
| Cine-minne | 1200 bilder |
| Bildformat | PNG, AVI, BMP, JPEG, DICOM |
| Avbildningslägen | B, 2B, 4B, M, B/M, B/C, PW, CW, CFM, 4D |
| Anslutning | Ethernet (100Mb/1000Mb), VGA, HDMI, DICOM 3.0 |
| Frekvens för strålgenerator | 1 till 40 MHz |
| Mått | 73 x 113 x 144 cm |
| Vikt | 80 kg |
| Paketvikt | 200 kg |
Förberedelser för installation
Förberedelserna för installationen av YR06635 involverar flera viktiga steg:
- Uppackning: Ta försiktigt bort YR06635 från dess förpackning och se till att alla komponenter är intakta och fria från skador.
- Platsval: Välj en stabil och ren yta med tillräckligt med utrymme för drift och säkerställ tillgång till ström och kommunikationsnätverk.
- Nivellering: Se till att skannern placeras på en plan yta för att förhindra feljustering under drift.
Installationssteg
Ansluta ström- och dataportar
Börja med att ansluta strömförsörjningen till YR06635. Följ dessa steg:
- Anslut strömkabeln till enheten och koppla in den i ett vägguttag.
- Se till att alla dataportar, inklusive USB- och Ethernet-anslutningar, är ordentligt anslutna för att möjliggöra datatransfer.
Initial systemkalibrering
När enheten är påslagen, utför följande:
- Gå till systeminställningarna för att köra initiala kalibreringsdiagnoser.
- Justera inställningarna enligt tillverkarens rekommendationer för att säkerställa optimala bildkapaciteter.
Vanliga installationsmisstag
Under installationen av YR06635, undvik dessa vanliga misstag:
- Felaktig installation av transducerportar, vilket kan leda till potentiella kommunikationsproblem.
- Underlåtenhet att kalibrera systemet, vilket kan resultera i felaktiga bilder.
Felsökning av vanliga problem
Enheten slås inte på
Om YR06635 inte slås på, överväg följande:
- Kontrollera att strömkabeln är ordentligt ansluten till enheten och uttaget.
- Inspektera vägguttaget för funktion genom att testa det med en annan enhet.
Felkod E-03
Detta fel kan indikera ett problem med transducern. För att lösa:
- Se till att alla transducern är korrekt anslutna till sina respektive portar.
- Starta om enheten för att uppdatera systemet.
Vanliga frågor
Vilka typer av sonder är kompatibla med YR06635?
YR06635 stöder ett brett utbud av sonder, inklusive konvexa array, linjära array, intracavitära, mikro-konvexa, kardiella och specialiserade 4D volymsonder.
Är YR06635 kompatibel med sjukhusledningssystem?
Ja, YR06635 följer helt DICOM 3.0-protokollet, vilket möjliggör enkel utskrift och sändning av rapporter över medicinska nätverk.
Har YR06635 automatiserade funktioner?
Ja, den inkluderar automatiska IMT (Intima-Media Tjocklek) mätningar och automatiserad Pulsvåg (PW) spårning för att påskynda den diagnostiska processen.
Vilka miljöförhållanden är optimala för att använda YR06635?
Enheten fungerar bäst i miljöer med kontrollerad temperatur och luftfuktighet, och undviker extrema svängningar. Se till att ha ordentlig ventilation och minimal vibration.
Hur ofta bör underhåll utföras på YR06635?
Regelbundet underhåll bör schemaläggas enligt tillverkarens riktlinjer, vanligtvis var 6-12 månad, beroende på användningens intensitet.
Kan jag uppgradera lagringskapaciteten på YR06635?
Ja, lagringen kan uppgraderas från den standard 64GB SSD till antingen 120GB eller 200GB för att rymma mer data och bildbehandling.
Vad är garantiperioden för YR06635?
YR06635 kommer vanligtvis med ett års garanti, som täcker delar och arbete för eventuella tillverkningsfel.
Om du letar efter en fusion av innovation och kvalitet har du kommit till rätt ställe. På Kalstein erbjuder vi dig lyxen att utforska vår exklusiva katalog av laboratorieutrustning. Vi tillverkar varje enhet enligt de högsta standarderna för excellens. Våra intuitiva och sömlösa onlineköpskanaler är utformade för din bekvämlighet, vilket säkerställer de mest konkurrenskraftiga priserna. Tveka inte längre — vi ger liv åt vetenskapen, det är dags att bli en del av vår gemenskap.